
Golpe Definitivo
Save it for Einar or Capo. Hit Capo fast before he hires more bandits.
Arena guides › Arena 9
Physical covers both bosses: Einar has magic armor and Capo has none. Merodeador, Asaltante and the scrap-armor Bandido have physical armor, so the deck also brings magic (Gema and Mago Arcano). Rivals can freeze your towers with Torre de Granja and Triturador's rocks, and send Planeadores Bandidos over your defense. That's why Mecha is in this deck now.
 Einar el Guardián de BestiasMagic armorHit with physical · Ref. HP 40,000
 CapoNo armorHit with anything · Ref. HP 33,000
Enemy armor in this arena:
5 magic armor 3 physical armor 4 no armor
| Tower | Code | Spots | Role | Why |
|---|---|---|---|---|
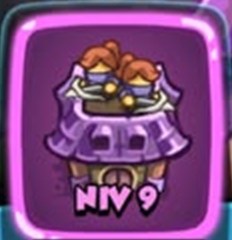 Fuerte de Ballesteros Fuerte de Ballesteros | FB | ×3 | Boss killer | Physical boss killer for Einar and Capo. Fast shots that also hit Águila Salvaje and Planeadores Bandidos. Cetrero boosts nearby towers. Buy Aluvión at NIV3: 20 hits of 471–538 every 15 s. |
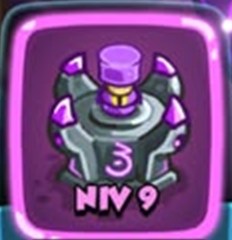 Mago Arcano Mago Arcano | MA | ×2 | Boss killer | Magic burst for Merodeador and Asaltante, which have physical armor. A second boss killer at the exit. |
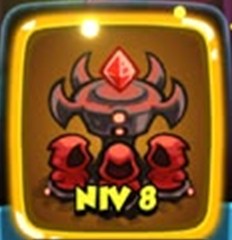 Gema Llameante Gema Llameante | GL | ×2 | Main damage | Main damage. The beam melts the brutes and Triturador, and Llamado Eldritch blocks Tramposo. |
 Mecha de Batalla Mecha de Batalla | ME | ×1 | Support | Poder Mecánico keeps nearby towers from being stunned or disabled: your answer to Torre de Granja and Triturador's rocks. Misil Avispa does true damage. Put it in the most central spot. |
Boss killers go next to the exit. Main damage goes where the path passes on several sides. Support goes in the most central spot. Early towers go near the gates.
| Tower | Buy first | Then | Why |
|---|---|---|---|
| Fuerte de Ballesteros | Aluvión (220) | Vista Corta (180) | Aluvión fires 20 hits of 471–538 physical damage every 15 s, about 10,000 damage in one burst. That's your best boss killer for magic-armored bosses. Vista Corta sends hawks to the same spot on your opponent's side and cuts the range of the tower built there by 17% and its damage by 20%. Buy it second, or first if your opponent has a dangerous tower on that spot. |
| Mago Arcano | Rayo de la Muerte (168) | Teletransporte (190) | Rayo de la Muerte is the boss killer (5,506–6,730). Teletransporte sends 4 enemies back 1.7 tiles. |
| Gema Llameante | Llamado Eldritch (180) | Gema de Multiplicación (210) | Eldritch blocks the path and does true damage. Multiplicación splits the beam across 2 targets, which is worse against a lone boss and better against swarms. In Arena 15, buy Multiplicación first. |
| Mecha de Batalla | Misil Avispa (205) | Descarte de Residuos (160) | Misil Avispa does 1,649–1,915 true area damage. Descarte slows by 40%. The anti-stun aura is automatic. |
Save it for Einar or Capo. Hit Capo fast before he hires more bandits.
Cast it on Saqueador or Einar, which have magic armor, so your Gema and Mago Arcano can hurt them too. Or cast it on Merodeador groups to help your Fuerte.

Use it on dense bandit groups and on the boss's escort.

Tormenta Arcana does true damage (14 hits of 404–606 in a 120 area), so it ignores both the magic armor of Saqueador and Einar and the physical armor of Merodeador and Asaltante. His ranged attack hits for 1,312–1,481, and he respawns in only 12 s.
Where to keep him and when to move: He's fragile (3,370 health, 15% armor), so keep him behind your Fuerte de Ballesteros and never in front of Saqueador. Use Teletransporte to jump to whichever lane is in trouble. Cast Tormenta Arcana on the thickest bandit group, and use Espejismo's illusions to block Tramposo when it tries to run past. Because he respawns fast, it's fine to trade him for a boss kill.
Once per stage you pick 1 of 3 boosters. Commit to 1–2 of them so they level up. All boosters of this arena

Turns your rival's towers into useless farms for a while. The strongest pressure pick here.

Very high health, physical armor, and its rocks disable your rival's towers and units.

Fly over defenses and hit hard: good against soldier-heavy rivals.

High-health physical-armor group: good against physical-damage rivals.
What your rival can send you: Your rival can turn your towers into farms (Torre de Granja) or disable them with Triturador's rocks: that's why Mecha is in this deck. Planeadores Bandidos fly: Fuerte handles them.
Each picture shows the card and spot number. G is a gate where enemies come in, X is the exit, C is a rock mound that may be a tunnel. Tap a picture to open it full size. Jump to: Layout 1 · Layout 2 · Layout 3 · Layout 4 · Layout 5
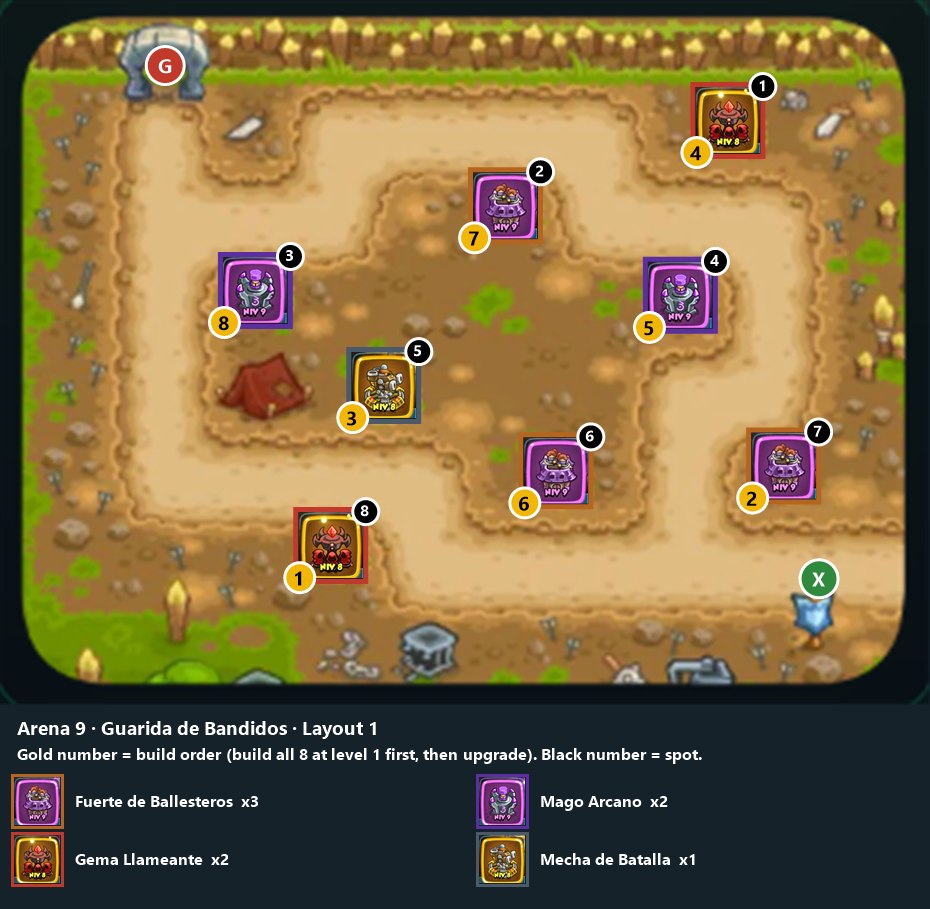 Gema LlameanteFuerte de BallesterosMago ArcanoMago ArcanoMecha de BatallaFuerte de BallesterosFuerte de BallesterosGema Llameante
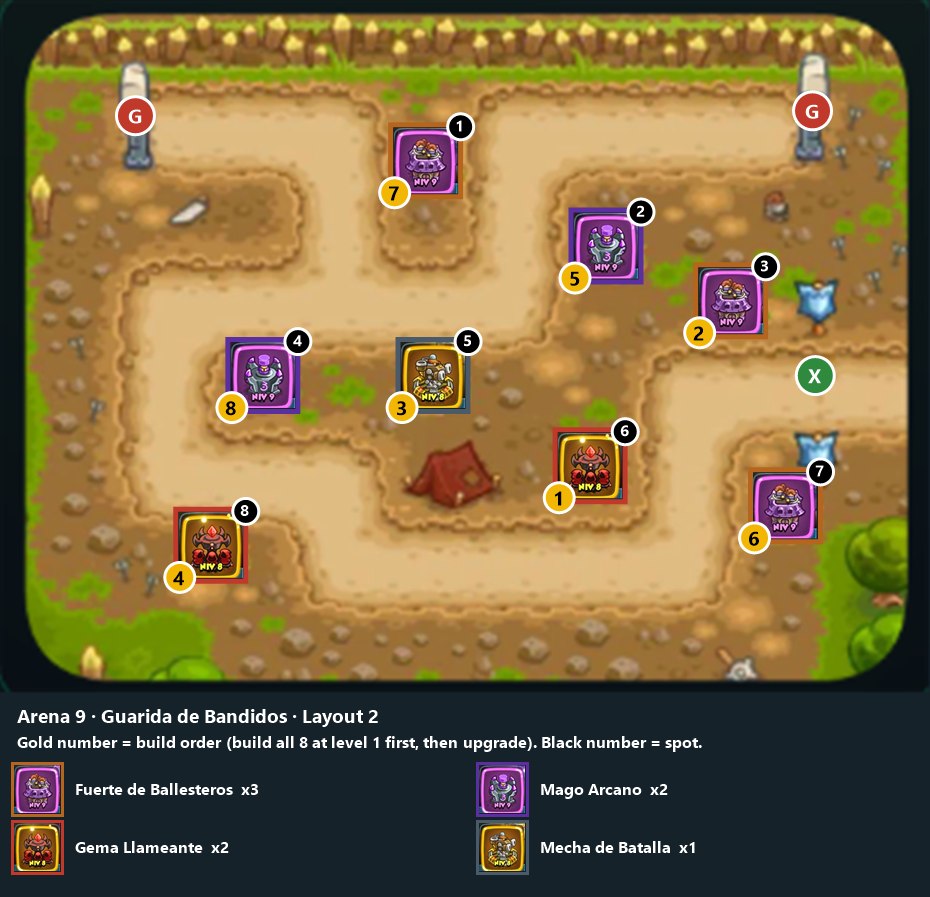 Fuerte de BallesterosMago ArcanoFuerte de BallesterosMago ArcanoMecha de BatallaGema LlameanteFuerte de BallesterosGema Llameante
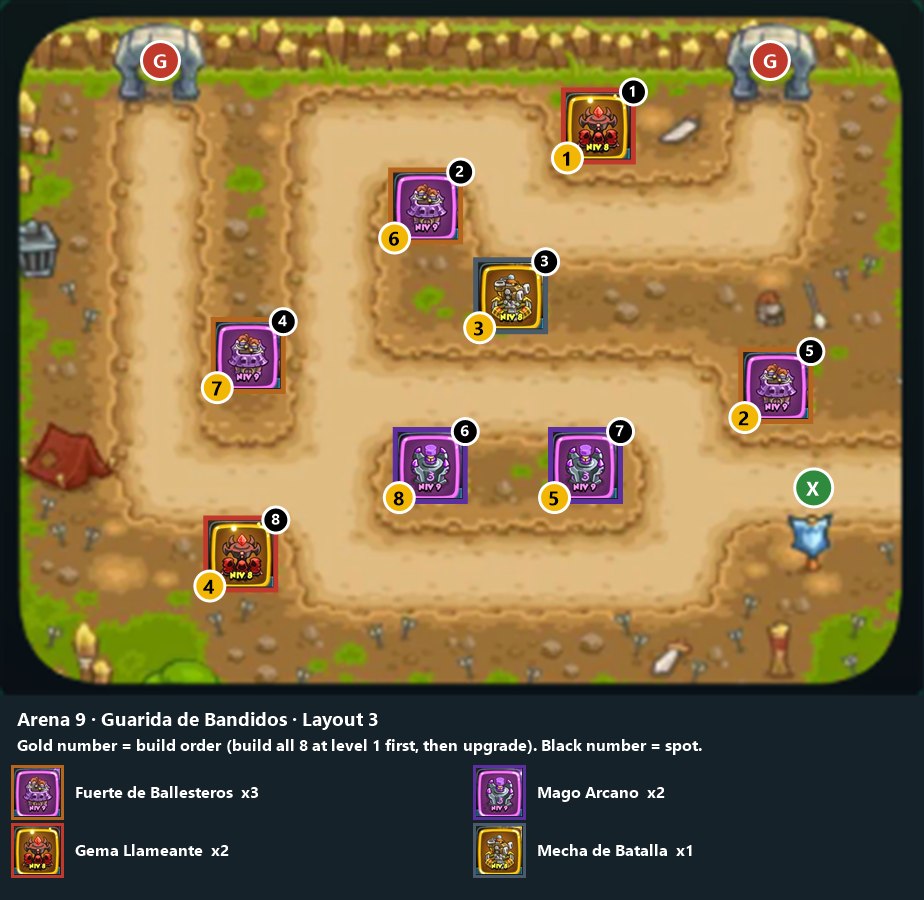 Gema LlameanteFuerte de BallesterosMecha de BatallaFuerte de BallesterosFuerte de BallesterosMago ArcanoMago ArcanoGema Llameante
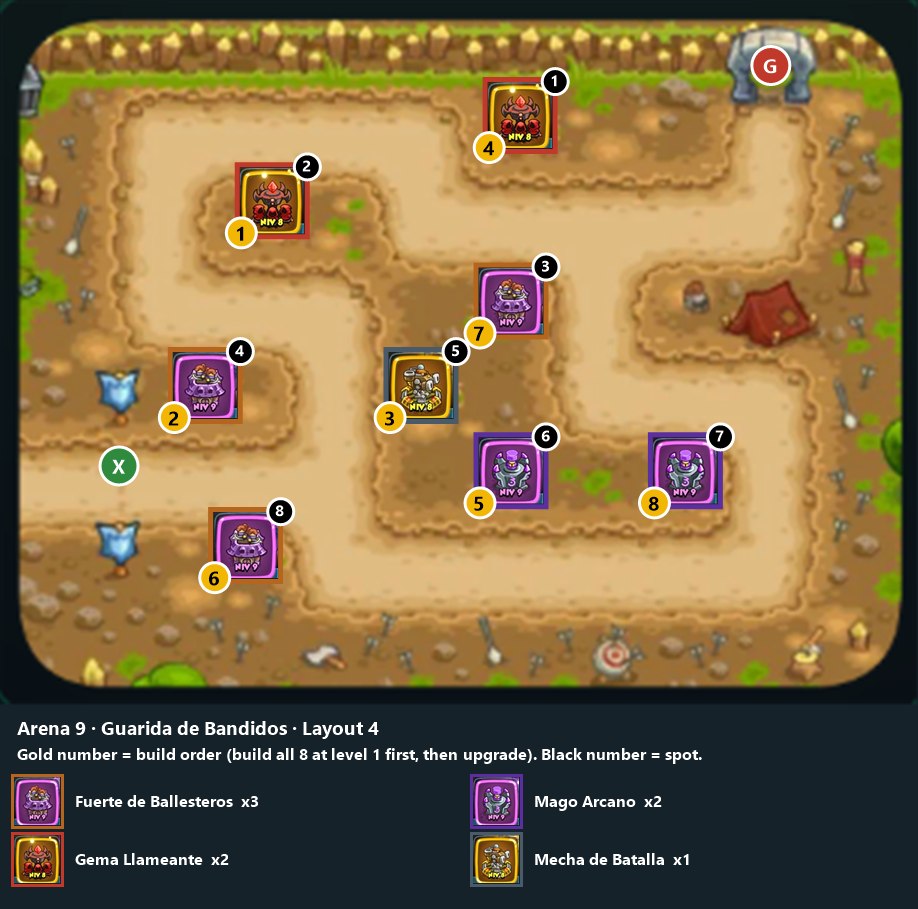 Gema LlameanteGema LlameanteFuerte de BallesterosFuerte de BallesterosMecha de BatallaMago ArcanoMago ArcanoFuerte de Ballesteros
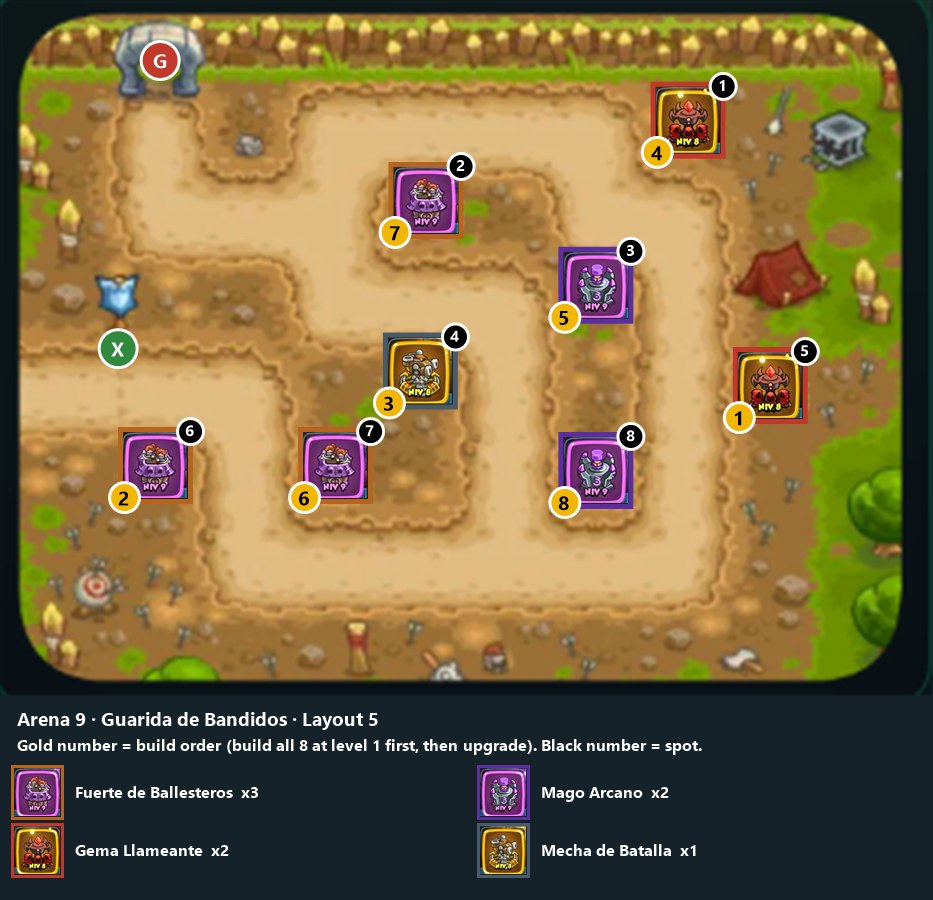 Gema LlameanteFuerte de BallesterosMago ArcanoMecha de BatallaGema LlameanteFuerte de BallesterosFuerte de BallesterosMago Arcano
Deck bonuses from these 8 cards.
Resistencia Heroica: +3% hero health (Fuerte de Ballesteros) Ira de Maná: +3% damage for all spells (Mago Arcano) Fuerza Mágica: +5% damage for magic towers (Gema Llameante) Enfoque de Mana: −2% cooldown for all spells (Gema Llameante) Decadencia del Invasor: −3% physical armor on enemies (Mecha de Batalla) Fortaleza de Infantería: +2% armor for your soldiers and summons (Mecha de Batalla) Asalto Heroico: Hero bonus (?%) (% not shown in your screenshots) (Golpe Definitivo) Pulso de Aguja: −2% ability cooldowns for all towers (Sabotaje) Concentrar Invocación: −5% cooldown for summoning spells (Ráfaga Solar) Resistencia de Infantería: +7% health for your soldiers and summons (Ráfaga Solar) Depleción de invasores: −3% magic armor on enemies (Magnus Rompehechizos)